Heads up! If you are looking for the new mobile app, please
Click Here.
Index
Overview
The mobile app is design to give the technician all the information they need and help with recording information within the job.
Below is the interface flow for the mobile app:

Connecting a device
On Android:
- Open the web browser or Chrome.
- Type in the URL for the mobile app, for example 'company.nsmcloud.com.au/m'.
- Tap the menu button and tap 'Add to home screen'.
- Chrome will add a shortcut to your home screen.
On iOS:
- Open the Safari web browser.
- Type in the URL for the mobile app, for example 'company.nsmcloud.com.au/m'.
- Tap the Share button on the browser's toolbar that's the rectangle with an arrow pointing upward. It's on the bar at the top of the screen on an iPad, and on the bar at the bottom of the screen on an iPhone or iPod Touch.
- Tap the Add to Home Screen icon in the Share menu.
- You'll be able to enter a name for the shortcut and then click Add. It will now be add to your home screen.
On TomTom:
- Open the web browser under 'All apps'.
- Type in the URL for the mobile app, for example 'company.nsmcloud.com.au/m'.
- Tap the menu button and tap 'Settings'.
- Tap the 'General' button.
- Tap the 'Set Homepage' button.
- Tap the 'Current page' button.
- Go back to 'All apps' and open 'Settings'.
- Tap the 'System bar' button.
- Tap the 'Assign app' button.
- Tap the 'Browser' button.
- You can now open the NSM mobile app by clicking the browser button on the system bar at the bottom of the screen.
Login
To login the user must enter their username and password. After 10 failed in login attempts the IP address will be blocked from attempting again for 30 minutes. The employee must have Mobile App access right.
After 5 failed login attempts please call the office and ask a user with Admin access to give you the correct login details else your device will be locked out for 30 minutes.
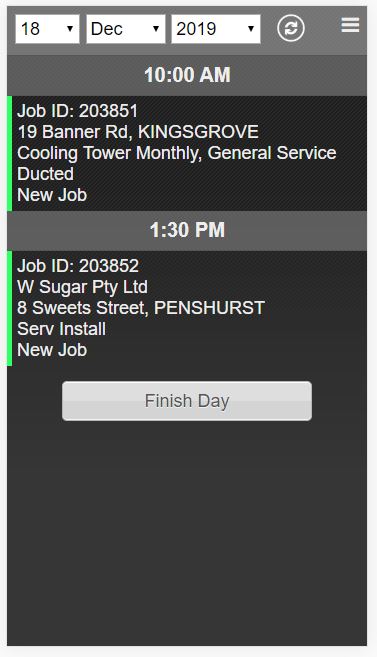
Job list
Jobs for the technician logged in will display for the selected date. The date will automatically default to the current date. To preview the job detail simple click on the job. The colour on the left of the job represents the job status.
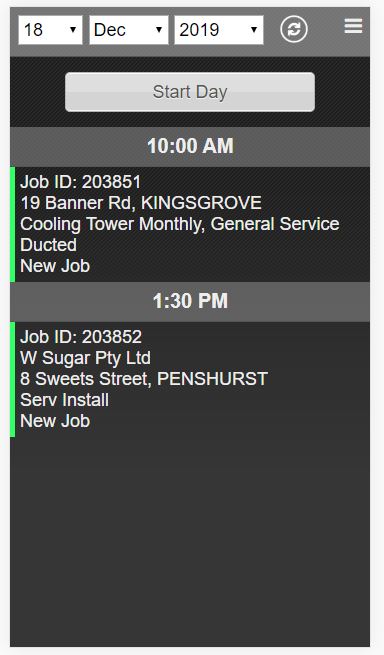
Optional
A Start Day and Finish Day button may be available depending on system settings. This records when the day is started and finished. The technician should click Start Day when they start traveling to their first job or when they leave their office.
Once the day is started then the Finish Day button will display. This information can be used to generate a time sheet. It can work as a clock on and clock off system.
Preview Job
The preview allows the technician to view the job details without starting the job. This is normally required when preparing for the next job or tomorrow's jobs.
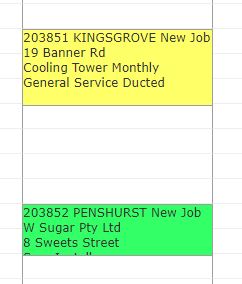
When the technician want to start the job, click 'Start Job' this will time stamp the job and update the job status from Scheduled to In progress changing the colour of the job in the mobile app and also in the office.
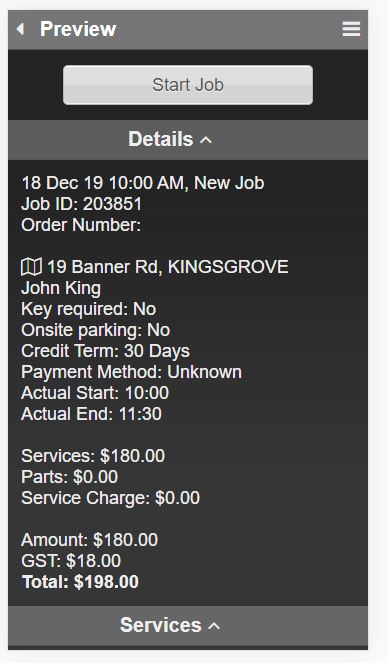
Here you can see the job 203851 changing from Scheduled to In progress. Note the colour can be customised in each system so they may vary.
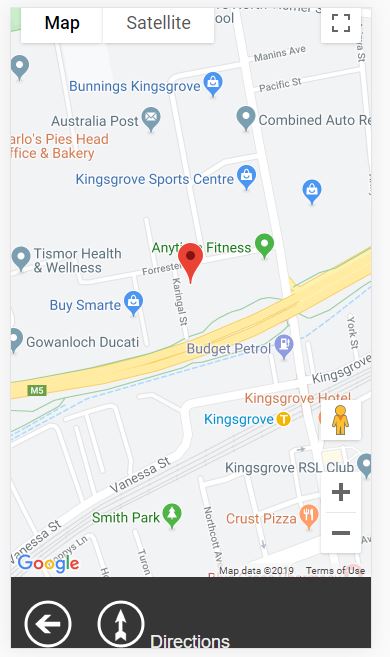
Map
When the site address is clicked a Google map will display. Click on the back arrow to go back to the job.
Job Details
After the job is start all the details will display and information can be entered in.
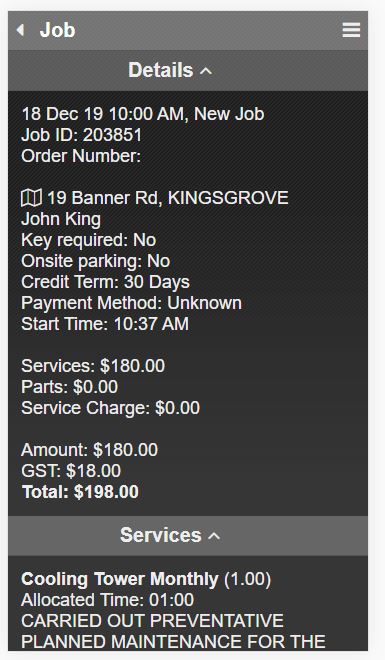
The list of services and job note will display. Some of the functions below like 'Signature', 'Feedback' or 'Office Note' may not be enabled. Each system can be configured to the business needs.
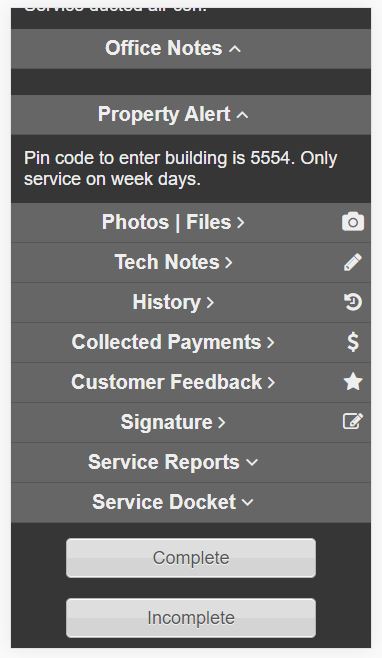
Property alerts is a unique note related to that property and will be there for each job at that property.
After a job is start two button will display 'Complete' and 'Incomplete', when the job is all done press the 'Complete' button, if it not complete press the 'Incomplete' button. It will then allow you to enter in the reason why it is not complete such as 'No access to job site' or 'Missing parts'.
Tech notes, Photos, Service Reports and Customer Signature are sometime made required for a job to be completed. If a job will not allow you to mark it as complete please read the red message below it to see what is required to complete the job.
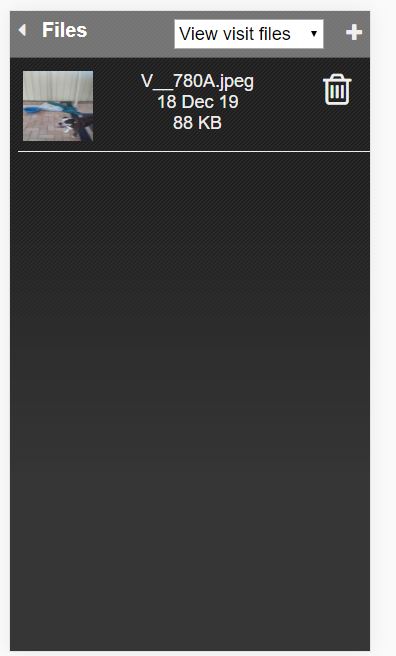
Photos and Files
Files can be added from the office and the mobile app. Any file or photos upload will be connected to the current job the technician is in.
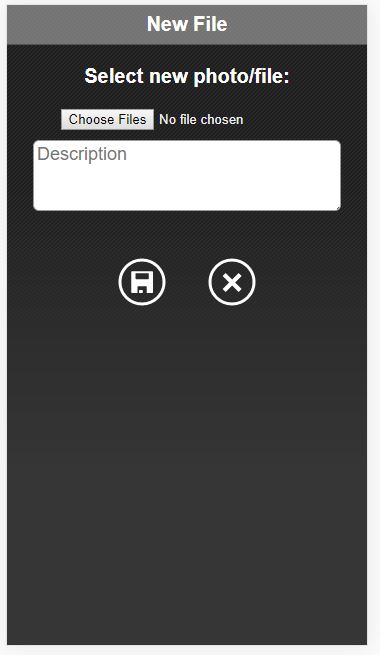
New File
To add a new photo or file press the plus sign on the top right and a new screen will display with the options to select a file and enter in a description. When you press 'Choose File' in android or 'Select File' in iOS the device will ask you to use Gallery or Camera, ether take or new photos or select the photos you want to upload.
The upload time will depend on the mobile reception. If these no mobile reception such as a building basement, simple take the photos with your camera and upload them once you get back to ground level.
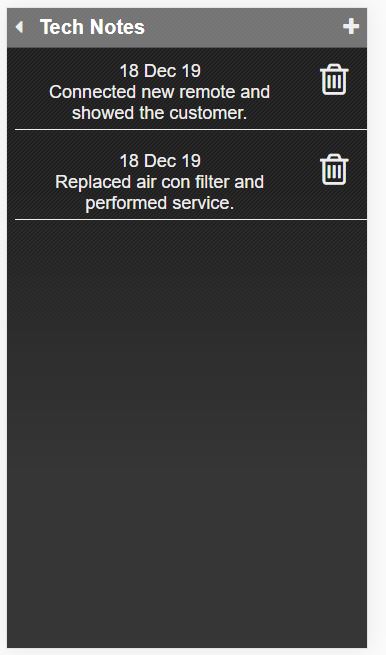
Tech Notes
Technicians can enter any many Tech Notes as required. One tech note is normally set as a minimum to complete a job. To enter a new Tech Note, press Tech Notes and press the plus sign on the top right hand side.
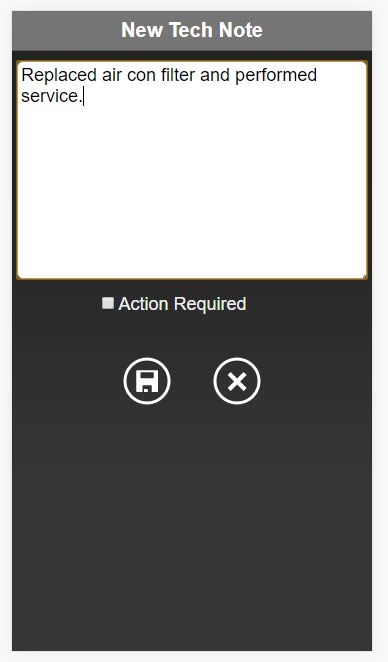
New Tech Note
A new tech note can be as long as you need. After you enter the note press the Save icon.
The tick box 'Action Required' will make the Tech Note display in the office on the system Overview. This is design to be used when you need the office to action a task.
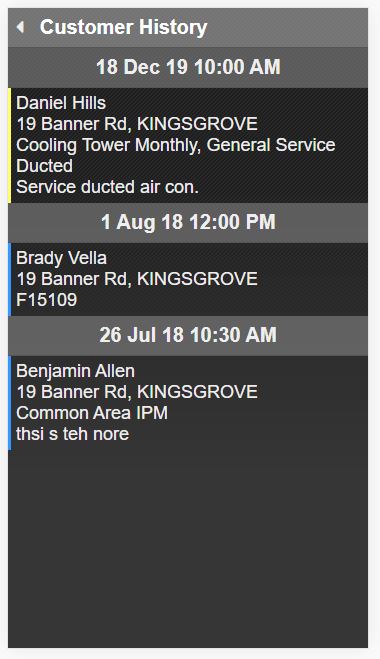
Customer History
This function is optional and allows the technician to view all historical jobs done at that current property. To go back to the current job press the back arrow on the top left hand side.
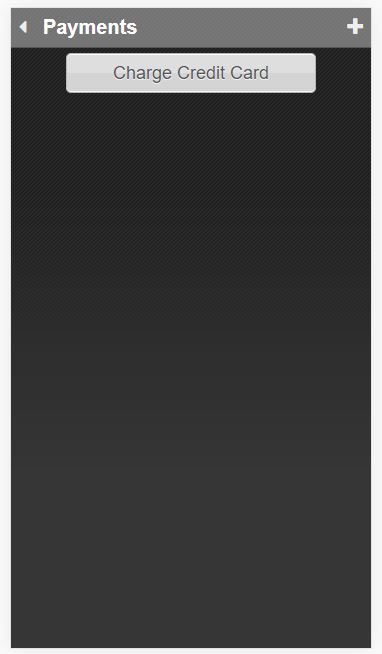
Collected Payments
This function allows the technician to collect payments from the customer and record what was collected. Credit cards can also be processed if setup.
To enter a new payment collected press the plus sign on the top right or click 'Charge Credit Card' to process a credit card payment.
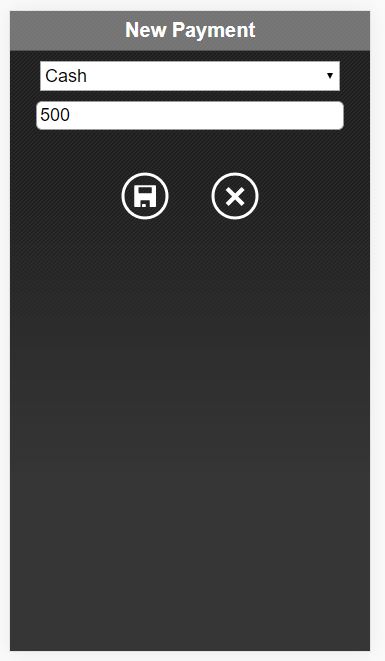
Select the payment method and enter the amount and press Save.
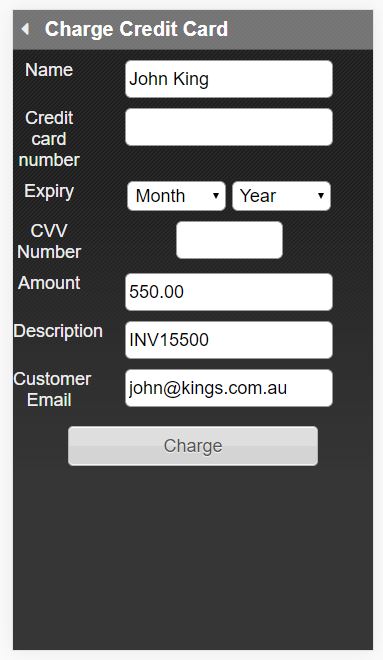
To charge a credit card please enter the customer's name credit card number, expiry, CVV, the amount, the description and the customers email address. Some of these field will be prefilled.
Once you click 'Charge' it will send the details to the payment gateway and respond back with a message saying if it is successfully or not.
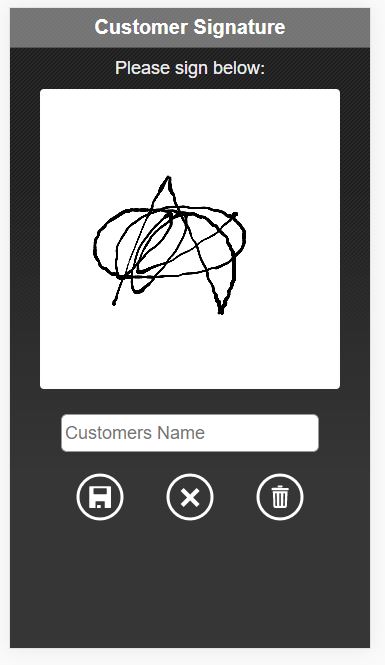
Customer Signature
This function is to collect the customer signature when the job is done as proof that the job was successfully completed. The signature can be displayed on a service report.
If they need to restart press the delete button to clean the screen.
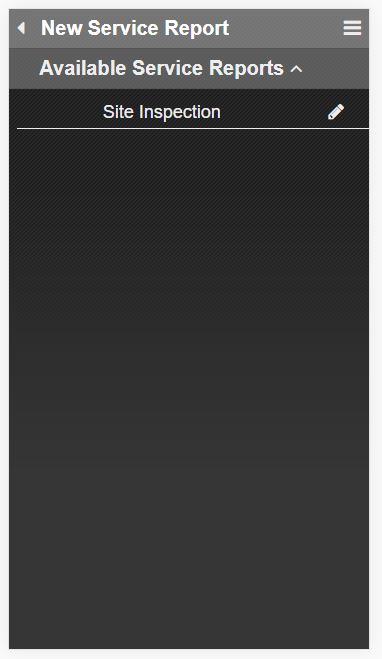
Service Reports
Technicians are sometime required to create field service reports detailing what work was done during an onsite visit. These reports can be generated as a PDF documents and then emailed to the customer.
To complete a service report press Service Reports and then select the service report you want to complete. The available service reports will be depending on what services are booked in.
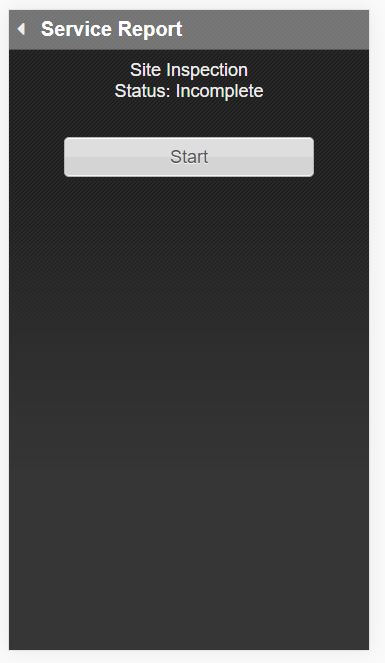
Once you have the Service report you want to complete press Start. If the service report is already started it will remember where you are up to and continue from that point.
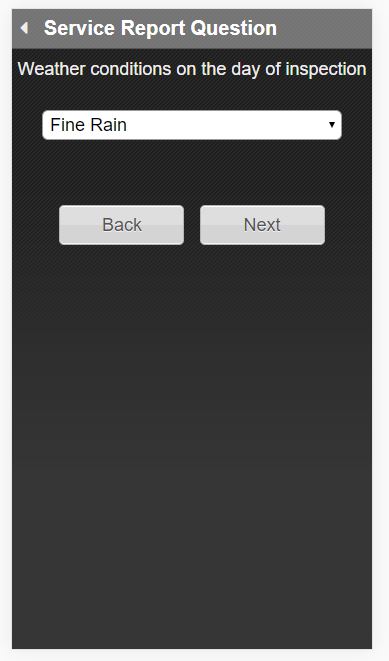
The questions can be open text box, Yes or No, Ture or False, Tick box or dropown box.
Select the correct answer and it will move to the next questions untill all questions are answered.
Email on completion
When the Job Complete email function is enabled, a tick box will display above the Complete button to confirm you want to send a Job Complete email to the customer.
Tick the 'Email on completion' and confirm the customer email address, it should be entered in by default if the system already has the email address on record.
A templated email will be send to the customer once the job is completed.
Updated: 4 March 2026